Heat Press Temperature Guide for Vinyl: A Comprehensive Overview
Mastering heat press temperatures is crucial for flawless vinyl applications. This guide explores optimal settings for various vinyl types, fabric compatibility, and troubleshooting tips to ensure professional results consistently.
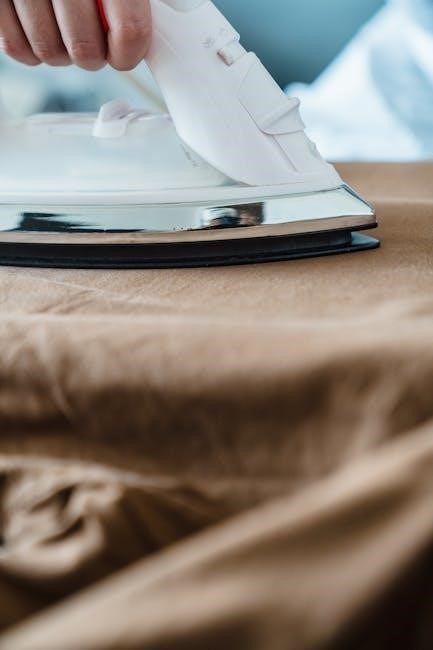
Heat pressing is a popular method for transferring designs onto fabrics using heat transfer vinyl (HTV). It involves applying heat, pressure, and time to ensure the vinyl adheres properly to the material. Whether you’re crafting custom apparel, accessories, or home décor, understanding the basics of heat pressing is essential for achieving professional-looking results. This guide will walk you through the key factors to consider, including temperature settings, pressing times, and fabric compatibility. By mastering these elements, you can unlock the full potential of heat transfer vinyl and create stunning, long-lasting designs with ease. Perfect for beginners and experienced crafters alike, this comprehensive overview will help you avoid common mistakes and achieve flawless transfers every time.
Understanding Different Vinyl Types
Heat transfer vinyl (HTV) comes in various types, each with unique properties and requirements. Standard HTV is the most common, offering durability and vibrant colors. Metallic vinyl adds a shiny, reflective finish, while glitter vinyl provides a sparkling effect. Neon and reflective vinyl are ideal for high-visibility designs. Printable HTV allows for custom prints, making it perfect for complex designs. Each type has specific temperature and time recommendations to ensure proper adhesion and longevity. Understanding these differences is key to achieving professional results and avoiding common issues like peeling or fading. By selecting the right vinyl for your project, you can create stunning, long-lasting designs tailored to your needs.

Temperature Settings for Various Vinyls
Standard vinyl: 300-320°F, metallic: 310-330°F, glitter: 315-335°F, neon/reflective: 300-325°F, printable HTV: 280-300°F. Each type requires specific temperatures for optimal adhesion and durability.
Standard Heat Transfer Vinyl (300-320°F)
Standard heat transfer vinyl is the most commonly used material for heat pressing, requiring temperatures between 300°F and 320°F. This range ensures proper adhesion without damaging the vinyl or fabric. Pressing time typically ranges from 15 to 20 seconds, depending on the vinyl thickness and fabric type. It’s important to avoid overheating, as it can cause vinyl to shrink or lose its adhesive properties. For cotton fabrics, 300°F is ideal, while polyester blends may require slightly higher temperatures. Always refer to the manufacturer’s guidelines, as some brands like Siser or HeatTransferWarehouse may have specific recommendations. Testing with a small sample before full application is recommended to ensure optimal results.
Metallic Vinyl (310-330°F)
Metallic vinyl stands out with its shimmering finish but requires precise temperature control for optimal application. The ideal temperature range is between 310°F and 330°F, ensuring the metallic finish adheres evenly without peeling or losing luster. Pressing time typically ranges from 15 to 20 seconds, though thicker metallic vinyls may need up to 25 seconds. Overheating can cause the foil to separate from the adhesive, while underheating may result in incomplete adhesion. Use medium to high pressure to ensure contact, especially on fabrics like cotton or polyester blends. Testing a small sample first is crucial to avoid ruining the design. Some brands, such as Siser or HTV, offer specific guidelines, so always check the manufacturer’s instructions for best results.
Glitter Vinyl (315-335°F)
Glitter vinyl adds a vibrant, eye-catching sparkle to designs but requires higher temperatures for proper adhesion. The recommended temperature range is 315°F to 335°F, ensuring the vinyl adheres securely without damaging the glitter. Pressing time typically ranges from 15 to 25 seconds, depending on the design complexity and vinyl thickness. Overheating can cause the glue to burn, while underheating may result in poor adhesion. Use medium to high pressure to ensure even contact, especially on fabrics like cotton or polyester blends. Some brands may suggest slightly different settings, so always consult the manufacturer’s guidelines. Testing on a small sample first is advisable to achieve the perfect balance of heat and time, ensuring the glitter remains intact and the design lasts long. Proper application ensures a durable, shimmering finish that withstands washing and wear.
Neon and Reflective Vinyl (300-325°F)
Neon and reflective vinyls are vibrant and highly visible, often used for unique designs and safety applications. The optimal temperature range for these vinyls is 300°F to 325°F, ensuring proper adhesion without damaging the reflective or neon properties. Pressing time typically ranges from 15 to 20 seconds, depending on the vinyl’s thickness and the fabric type. Medium to high pressure is recommended to ensure a secure bond. Neon vinyl is ideal for glowing effects in low-light conditions, while reflective vinyl is perfect for high-visibility apparel; Overheating can cause the reflective coating to degrade, so precise temperature control is essential. Testing on a small sample first is advised to avoid ruining the design. Proper application ensures a durable, long-lasting finish that maintains its brightness and reflective qualities through washing and wear. Always refer to the manufacturer’s guidelines for specific recommendations.
Printable Heat Transfer Vinyl (280-300°F)
Printable heat transfer vinyl (HTV) requires a slightly lower temperature range of 280-300°F for optimal results. This ensures the sublimation ink adheres correctly without burning or degrading. Pressing time typically ranges from 25-30 seconds, allowing the ink to fully transfer to the fabric. Medium pressure is recommended, but slightly higher pressure may be needed for vibrant colors. Overheating can cause ink to bleed or lose vibrancy, so precise temperature control is essential. Testing a small sample first is advisable to ensure the design appears as expected. Printable HTV is ideal for custom designs, logos, and full-color images. Always use heat-resistant paper and follow the manufacturer’s instructions for the best outcome. Proper alignment and pressing techniques are crucial for professional-quality results. This vinyl type is versatile and perfect for intricate, detailed designs. Adjustments may be needed based on fabric type and thickness.
Brand-Specific Temperature Considerations
Temperature settings can vary depending on the vinyl brand, as different manufacturers may have specific recommendations. Always consult the product packaging or the manufacturer’s website for precise guidelines. Some brands, like Cricut, may suggest slightly lower temperatures for printable HTV, around 280°F, while others might recommend higher settings for metallic or glitter vinyl. It’s important to test small samples to ensure the vinyl adheres properly without damage. Adjustments may also be needed based on the thickness of the vinyl or the type of ink used. Sticking to the recommended range ensures vibrant colors and a durable finish. Proper alignment and pressing techniques are crucial for achieving professional-quality results. Always follow the manufacturer’s instructions for optimal outcomes. This ensures consistent and long-lasting designs on various fabrics. Testing different settings helps refine the process for specific materials. Adjustments may be required based on the design complexity and fabric type. This step ensures the best results for custom projects. Following these guidelines helps avoid common issues like peeling or fading. Proper temperature control is key to achieving professional-grade finishes. This attention to detail ensures satisfaction with every project. By adhering to brand-specific recommendations, users can achieve consistent and high-quality results.
Time Settings for Optimal Application
Optimal application times range from 15-25 seconds, depending on vinyl type and thickness. Adjustments may be needed for intricate designs or special materials.
Standard Vinyl Pressing Time (15-20 Seconds)
For most standard heat transfer vinyls, a pressing time of 15-20 seconds is typically recommended. This duration ensures proper adhesion of the vinyl to the fabric without risking damage to either the material or the design. It’s essential to maintain this timeframe to achieve a balanced application, avoiding under-pressure or over-application. This standard time works well for common fabrics like cotton and polyester blends. Slight adjustments may be necessary based on design complexity or fabric thickness, but 15-20 seconds remains the benchmark for standard vinyl pressing. Exceeding this time could lead to vinyl melting or discoloration, while shorter times might result in incomplete adhesion. Always refer to the vinyl manufacturer’s guidelines for specific recommendations to ensure optimal results. This timeframe ensures a professional finish for most projects.
Thicker Vinyls and Longer Pressing Times (20-25 Seconds)
Thicker vinyls, such as metallic or glitter, often require longer pressing times to ensure proper adhesion and durability. A duration of 20-25 seconds is typically recommended for these materials. This extended time allows the heat to penetrate deeper into the vinyl, ensuring a strong bond with the fabric. However, overdoing the pressing time can risk damage to the vinyl or fabric. It’s crucial to balance time and temperature for optimal results. Thicker vinyls may also require slight increases in temperature, but the pressing time remains a critical factor. Always test a small sample before applying to your final product to avoid errors. This ensures the design adheres correctly without compromising the material’s integrity.
Adjusting Time for Design Complexity
Design complexity plays a significant role in determining the ideal pressing time. Intricate designs or those with multiple layers may require slightly longer pressing times to ensure all elements adhere properly. For example, detailed cuts or small text might need an additional 5-10 seconds to secure the vinyl fully. However, overextending the press time can risk damaging the vinyl or fabric. It’s essential to balance time and temperature based on the design’s intricacy. Layered designs, in particular, may need multiple presses at shorter intervals to avoid overheating. Always test a small, complex design on scrap fabric first to refine your settings. This ensures the final product meets your expectations without compromising quality or durability.

Pressure Recommendations
Proper pressure ensures even adhesion. Use 15-20 PSI for standard vinyl and 20-25 PSI for thicker types. Adjust based on fabric and vinyl thickness.
Standard Pressure Settings (15-20 PSI)
Standard pressure settings of 15-20 PSI are ideal for most heat press applications. This range ensures proper adhesion of the vinyl without damaging the fabric or apply too much force, which could lead to uneven pressing or vinyl peeling. For cotton fabrics, 15 PSI is often sufficient, while polyester or blended fabrics may require up to 20 PSI. The pressure should be evenly distributed across the press to avoid hot spots. If the vinyl is too thin, lower pressure may be necessary to prevent tearing. Conversely, thicker vinyls might need slightly higher pressure within this range. Always test a small sample before pressing a full design to ensure the pressure is appropriate for the specific vinyl and fabric combination. Proper pressure is key to achieving a professional finish and preventing common issues like peeling or bubbles. Start with the standard range and adjust as needed based on the material and results.
Increased Pressure for Thicker Vinyls (20-25 PSI)
Thicker vinyls, such as metallic or glitter varieties, often require increased pressure to ensure proper adhesion and a smooth finish. A pressure range of 20-25 PSI is typically recommended for these materials. This higher pressure helps the vinyl conform to the fabric more effectively, reducing the risk of bubbles or uneven application. However, it’s important not to exceed 25 PSI, as this could damage the vinyl or the fabric. Always test a small sample area first to ensure the pressure is appropriate for the specific vinyl and fabric combination. Adjusting the pressure correctly will result in a professional-looking finish and prevent common issues like peeling or incomplete adhesion. Balancing pressure with temperature and time is key to achieving optimal results with thicker vinyls.
Fabric Considerations
Fabric type significantly impacts heat press settings. Cotton, polyester, and specialty fabrics require specific temperature and pressure adjustments to ensure proper vinyl adhesion and prevent damage.
Cotton Fabric Requirements
Cotton fabrics are ideal for heat pressing due to their durability and ability to withstand high temperatures. For optimal results, set your heat press to 300-320°F, with a pressing time of 15-20 seconds. Ensure the fabric is dry and free of moisture, as this can affect vinyl adhesion. Preheating the fabric for 5-10 seconds before applying the vinyl is recommended to remove any residual moisture. Apply medium to high pressure, around 15-20 PSI, to ensure proper vinyl bonding. Avoid using excessive pressure, as it may damage the fabric or cause vinyl stretching. Always test a small, inconspicuous area first to ensure compatibility and desired results. Properly prepared cotton fabric will yield crisp, long-lasting designs with minimal peeling or fading over time.
Polyester and Blend Fabrics
Polyester and blend fabrics require careful temperature and pressure adjustments to avoid melting or discoloration. Heat press settings should be lower than those for cotton, typically between 280-300°F, with a pressing time of 10-15 seconds. Excessive heat can damage synthetic fibers, so it’s crucial to test a small area first. Apply medium pressure (15-20 PSI) to ensure proper vinyl adhesion without compromising fabric integrity. For blended fabrics with a high polyester content, reduce the temperature by 5-10°F to prevent scorching. Using heat-resistant tape to secure the vinyl in place can help achieve a smooth finish. Always preheat the fabric for 5 seconds to remove moisture and ensure even heat distribution. Proper settings will result in vibrant, durable designs on polyester and blend fabrics.
Specialty Fabrics and Delicates
Specialty fabrics, such as silk, rayon, or lace, require extra care when applying heat transfer vinyl. Lower temperatures are essential to prevent damage, typically ranging between 250-270°F. Pressing time should be reduced to 5-10 seconds to avoid scorching or discoloration. Use light pressure (10-15 PSI) and consider placing a heat-resistant barrier, like parchment paper, between the fabric and press. Delicate materials may benefit from a hot peel technique to prevent stretching or tearing. Preheating the fabric for 3-5 seconds can help ensure even heat distribution. Always test a small, inconspicuous area first to confirm compatibility and avoid irreversible damage. Adjusting settings carefully ensures vibrant designs on sensitive fabrics without compromising their integrity or texture.

Special Cases and Additional Tips
For specialty cases, consider layering vinyl, adjusting temperature/time for complex designs, and using cooling/hot peel techniques. Heat-resistant covers and parchment paper protect delicate materials, ensuring safe application.
Layering Vinyl: Adjusting Temperature and Time
When layering vinyl, adjust temperature and time to ensure proper adhesion without damaging lower layers. Increase temperature by 5-10°F for each additional layer but reduce press time by 2-3 seconds to prevent over-pressing. Start with the largest vinyl piece and work upwards, using heat-resistant paper to protect the design. Avoid overheating, as it can cause vinyl to peel or discolor. For intricate designs, test settings on scrap fabric first. Proper layering ensures a durable, professional finish, making it essential for complex projects. Always refer to the manufacturer’s guidelines for specific vinyl types and layering techniques.
Cooling vs. Hot Peel Techniques
Cooling and hot peel techniques are crucial for achieving professional results in heat pressing. Hot peeling involves removing the vinyl immediately after pressing, ideal for standard vinyl types and quick production. Cooling peeling requires letting the vinyl cool slightly before peeling, which is best for intricate designs, glitter, or metallic vinyls to prevent stretching or damage. For cooling, allow 5-10 seconds before peeling to ensure proper adhesion. Hot peeling works well for most fabrics but may not be suitable for delicate materials. Always test both methods on scrap fabric to determine the best approach for your project. Using heat-resistant paper can also help protect the design during peeling. Proper peeling techniques ensure long-lasting, professional-quality finishes.
Using Heat-Resistant Covers
Heat-resistant covers are essential for protecting your work surface and ensuring even heat distribution during the pressing process. These covers, often made of parchment paper or silicone-coated materials, prevent direct contact between the vinyl and the heat press platen, reducing the risk of scorching or damage. They are especially useful for delicate fabrics and specialty vinyls, such as glitter or metallic, which require precise temperature control. Using a heat-resistant cover also helps prevent vinyl from sticking to the press and makes cleanup easier. Always choose covers rated for high temperatures to avoid melting or degradation. Proper use of heat-resistant covers enhances the durability of your heat press and ensures professional-quality results for every project.

Troubleshooting Common Issues
Identify and resolve issues like vinyl not adhering or peeling by adjusting temperature, time, or pressure settings. Ensure proper calibration and fabric preparation for optimal results.
Vinyl Not Adhering: Possible Causes and Solutions
Vinyl not adhering to fabric is a common issue that can arise from incorrect temperature or pressure settings. Ensure the heat press is preheated to the recommended temperature for your specific vinyl type, as low heat can prevent proper adhesion. Check that the pressure is adequate, as insufficient pressure may cause the vinyl to lift. Additionally, verify the pressing time, as too short a duration may not allow the adhesive to activate fully. Clean the heat press platen and fabric surface to remove any dirt or moisture that could interfere with adhesion. Finally, confirm that the fabric is compatible with the vinyl type and that it is dry before pressing. Adjusting these factors can resolve most adhesion issues effectively.
Vinyl Peeling: Adjusting Temperature and Time
Vinyl peeling can occur if the temperature is too high or the pressing time is too long, causing the adhesive to degrade. To address this, reduce the temperature by 5-10°F and shorten the press time by 5 seconds. Ensure the vinyl cools slightly before peeling to prevent lifting. If using thinner vinyl, lower the temperature further to prevent damage. Always refer to the manufacturer’s guidelines for specific vinyl types, as some may require lower temperatures or shorter pressing times; Proper adjustment of these settings will help achieve a durable, long-lasting finish without peeling or damage to the design or fabric.
Tools and Accessories
Essential tools include heat-resistant paper or parchment for protecting your press. Digital heat presses offer precise temperature control, while manual machines suit smaller projects. Safety gear like gloves and goggles ensures protection during use.
Heat-Resistant Paper and Parchment
Heat-resistant paper and parchment are essential for protecting your heat press and fabric during transfers. These materials prevent direct contact between the press and the vinyl, reducing the risk of burns or damage. High-quality heat-resistant papers are designed to withstand extreme temperatures without melting or warping, ensuring even heat distribution. Parchment, often reusable, is a popular choice for its durability and ability to handle multiple presses. Always choose paper or parchment rated for the temperature range of your vinyl to avoid degradation. Proper use of these accessories extends the life of your heat press and prevents vinyl from sticking to the platen. Keep extra sheets on hand for consistent, professional results.
Digital vs. Manual Heat Press Machines
Digital and manual heat press machines cater to different needs and preferences. Digital machines offer precise temperature and time control, ideal for consistent results with various vinyl types. They often feature programmable settings and timers, making them user-friendly for beginners. Manual machines, while requiring more skill, provide hands-on control, appealing to experienced users who prefer to adjust settings intuitively. Both types are effective, but digital machines are better suited for intricate designs and high-volume projects, while manual presses are cost-effective and reliable for simpler tasks. Choosing the right machine depends on your project scale, budget, and personal comfort with technology. Each ensures optimal vinyl application when used correctly.
Safety Precautions and Protective Gear
Working with heat presses requires attention to safety to prevent accidents. Always wear protective gear, such as heat-resistant gloves and safety goggles, to shield yourself from burns and debris. Ensure the workspace is well-ventilated to avoid inhaling fumes from vinyl or other materials. Keep a fire extinguisher nearby and maintain a safe distance from flammable objects. Use a heat-resistant surface for pressing and avoid touching hot plates or surfaces directly. Properly handle vinyl and fabrics to prevent tears or uneven pressure. Familiarize yourself with the machine’s operation to avoid unintended startup or malfunction. Regularly inspect equipment for wear and tear to prevent hazards. Prioritize safety to ensure efficient and accident-free heat pressing sessions.

Maintenance and Environmental Factors
Regularly clean and maintain your heat press to ensure optimal performance. Store it in a cool, dry place and avoid extreme temperatures to preserve its efficiency and longevity.
Keeping Your Heat Press in Good Condition
Proper maintenance is essential for the longevity and performance of your heat press. Regularly clean the platens with a heat-resistant cleaner to remove residue and ensure even heat distribution. Inspect the machine for wear and tear, such as frayed cords or damaged pads, and address these issues promptly. Lubricate moving parts periodically to maintain smooth operation. Calibration is also crucial—check the temperature accuracy periodically and recalibrate if necessary. Store the heat press in a cool, dry environment when not in use to prevent rust or corrosion. Proper care will ensure consistent results and extend the life of your equipment.
Considering Room Temperature Effects
Room temperature significantly impacts heat press performance. Ideal operating conditions are typically between 65°F and 75°F. Higher room temperatures can cause the machine to overheat, leading to inconsistent pressure and temperature control. Conversely, lower temperatures may slow down the heating process, requiring longer warm-up times. To ensure accuracy, calibrate your heat press in the same environment where it will be used. If your workspace experiences extreme temperature fluctuations, consider using a thermometer to monitor conditions. Additionally, store your vinyl and materials in a stable environment to prevent moisture buildup, which can affect adhesion. Maintaining a consistent room temperature will help achieve reliable results and prolong the lifespan of your equipment.