Singer sewing machines are renowned for their durability and versatility, with comprehensive manuals offering detailed guidance on operation, maintenance, and troubleshooting․ These resources, available both in print and digital formats, ensure effective use and care for vintage models, helping users unlock their full potential․
1․1 Historical Overview of Singer Sewing Machines
Singer sewing machines have a rich history dating back to the 19th century, with the first practical sewing machine patented by Isaac Singer in 1851․ Over the years, Singer became a leader in the industry, producing durable and versatile machines․ Instruction manuals and serial numbers play a crucial role in identifying and dating these vintage models, helping enthusiasts maintain and understand their historical significance effectively․
1․2 Importance of Instruction Manuals for Vintage Models
Instruction manuals for vintage Singer sewing machines are essential for understanding operation, maintenance, and troubleshooting․ They provide detailed guidance on threading, tension adjustment, and stitch selection, ensuring effective use․ Manuals also include parts identification and repair tips, which are crucial for preserving these machines․ Availability in PDF or original copies from sources like Fixya, LRCrafts, and Singer Outlet UK makes them invaluable for enthusiasts and restorers alike․
Identifying Your Old Singer Sewing Machine
Identifying your Singer sewing machine involves checking its serial number, model number, and physical features like decals and badges․ This helps determine its age and model type․
2․1 Locating the Serial Number
The serial number on an old Singer sewing machine is typically found on the base, back, or side of the machine․ It may be engraved or printed on a metal plate․ For some models, it might be located near the handwheel or under the stitch plate․ Checking the machine’s instruction manual or Singer’s official resources can help pinpoint the exact location if it’s difficult to find․
2․2 Decoding the Serial Number for Model Identification
Decoding the serial number helps identify your Singer sewing machine’s model and production details․ Typically, the serial number includes a prefix letter and numbers, indicating the manufacturing location and production year․ Refer to Singer’s official serial number database or the instruction manual to match the number with the correct model․ This step is crucial for maintenance, repair, and compatibility with accessories․
Understanding the Parts of an Old Singer Sewing Machine
Decoding the serial number helps identify your Singer sewing machine’s model and production details․ Typically, the serial number includes a prefix letter and numbers, indicating the manufacturing location and production year; Refer to Singer’s official serial number database or the instruction manual to match the number with the correct model․ This step is crucial for maintenance, repair, and compatibility with accessories․
3․1 Major Components and Their Functions
The Singer sewing machine features a bobbin for holding the bottom thread, spool pins for the top thread, and a presser foot to keep fabric in place․ The handwheel controls needle movement, while the stitch length dial adjusts seam length․ The tension discs regulate thread tightness, and the take-up lever ensures proper thread flow․ Understanding these components ensures smooth operation and precise stitching․
3․2 Accessories and Attachments Overview
Singer sewing machines come with various accessories like presser feet, rufflers, and quilters․ Attachments such as zipper feet and buttonhole makers enhance functionality․ These tools allow for specialized stitching, embroidery, and heavy-duty sewing․ Accessories expand the machine’s capabilities, enabling users to tackle diverse projects with precision and ease, making them indispensable for both basic and advanced sewing tasks․

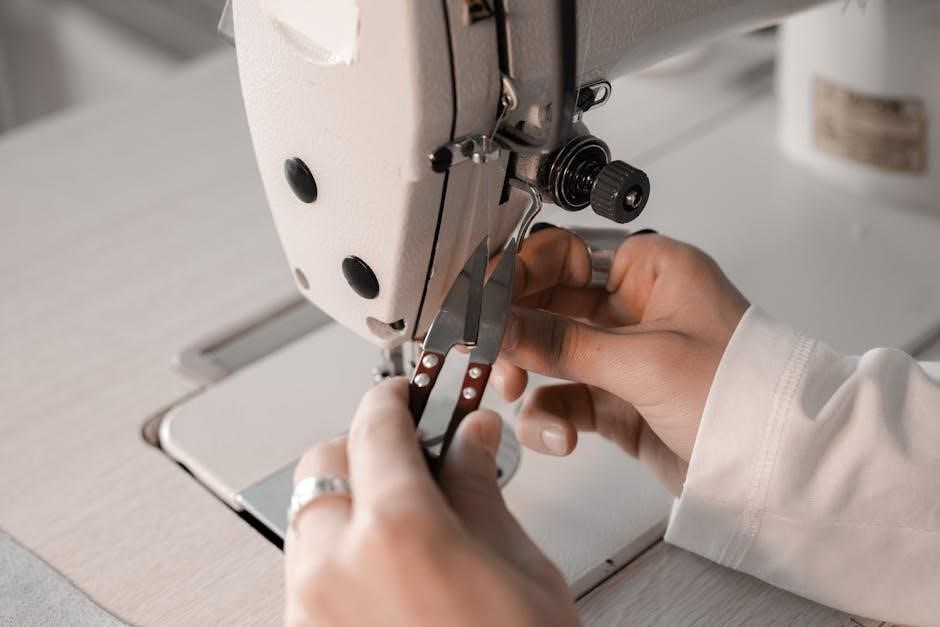
Threading and Basic Operations
Mastering threading and basic operations ensures smooth stitching․ Proper thread flow, tension adjustment, and bobbin setup are essential for optimal performance and consistent results․
4․1 Step-by-Step Guide to Threading the Machine
- Insert thread into the spool pin and guide it through the take-up lever․
- Gently pull the thread to remove any slack and ensure it’s seated properly․
- Thread through the tension discs, adjusting as needed for even stitch formation․
- Pass the thread through the bobbin case and pull gently to secure it․
- Ensure the machine is turned off and thread isn’t tangled before starting․
- Always refer to the manual for specific model adjustments․
4․2 Setting Up the Machine for First Use
To set up your Singer sewing machine, start by plugging in the power cord and ensuring the machine is placed on a stable surface․ Wind the bobbin with the appropriate thread and insert it into the bobbin case․ Attach the correct presser foot for your fabric type․ Ensure the machine is threaded properly and tension settings are adjusted․ Test the machine on scrap fabric before sewing your project․

Maintenance and Cleaning
Regular maintenance ensures the longevity of your Singer sewing machine․ Clean daily with a soft cloth, removing dust and lint․ Lubricate moving parts with a few drops of oil, focusing on the bobbin area and tension discs․ Use Singer-recommended oil to prevent damage and maintain smooth operation․
5․1 Cleaning the Machine Effectively
To clean your Singer sewing machine, start by turning it off and unplugging it․ Use a soft, dry cloth to wipe down the exterior, removing dust and dirt․ Gently brush lint from the bobbin area and tension discs using a small brush․ Avoid harsh chemicals, as they can damage the finish․ Regular cleaning prevents dust buildup and ensures smooth operation․ Clean after every use for optimal performance․
5․2 Lubrication and Oil Requirements
Regular lubrication is essential for maintaining your Singer sewing machine; Use a high-quality, light machine oil specifically designed for sewing machines․ Apply a few drops to the bobbin hook area, tension discs, and moving parts․ Avoid over-lubrication, as it can attract dust․ Oil every 10 hours of use or before long-term storage․ Always use Singer-recommended oils to prevent damage and ensure smooth operation․
Troubleshooting Common Issues
Identify and resolve issues like jamming, uneven stitches, or thread breakage․ Check tension settings, needle alignment, and bobbin installation․ Ensure proper threading and oil lubrication․
6․1 Diagnosing Needle and Thread Problems
Check for bent or dull needles, as they can cause thread breakage or uneven stitches․ Ensure the needle is correctly sized for the fabric and thread type․ Inspect the thread for knots or fraying․ Verify proper needle alignment and tension settings․ Clean the needle bar and hook area to prevent lint buildup․ Ensure the take-up spring is functioning correctly to maintain consistent thread tension․
6․2 Resolving Tension and Stitch Issues
Adjust the tension dials to ensure balanced thread flow․ Check for proper needle alignment and thread the machine correctly․ Inspect the bobbin case for lint and ensure it’s seated properly․ Test with a scrap fabric to isolate issues․ Clean or replace the take-up lever if faulty․ Ensure the presser foot is appropriate for fabric type․ Lubricate moving parts regularly to prevent friction-related problems․

Accessories and Attachments
Singer sewing machines come with various attachments for specialized tasks․ Common accessories include presser feet, zipper feet, and quilting guides, enhancing versatility for diverse sewing projects․
7․1 Types of Presser Feet and Their Uses
Singer sewing machines utilize various presser feet for specific tasks․ The all-purpose foot is ideal for straight stitching, while the zipper foot simplifies zipper installation․ The blind hem foot is perfect for invisible hems, and the quilting foot aids in precise quilt stitching․ Each foot is designed to enhance accuracy and versatility for different sewing projects, ensuring professional results․ Always use the correct foot for optimal performance․
7․2 Using Specialized Attachments for Embroidery and Quilting
Singer sewing machines offer specialized attachments for embroidery and quilting․ The embroidery hoop attachment allows for intricate designs, while the darning plate enables free-motion stitching; The quilting bar helps maintain even spacing for straight-line quilting․ These attachments expand creative possibilities, making complex techniques achievable․ Always refer to your manual for proper installation and usage to ensure optimal results for your projects․
Oil and Lubrication
Regular oiling is crucial for smooth operation․ Use Singer Oil or high-quality sewing machine oil․ Apply a few drops to the bobbin case and hand wheel․ Lubricate monthly or every 50 hours of use to maintain performance and prevent rust․ Avoid household oils, as they may damage the machine․
8․1 Recommended Oils for Vintage Singer Machines
Use Singer Oil or high-quality synthetic sewing machine oil to lubricate your vintage Singer․ Avoid household oils, as they may leave residue or damage parts․ Regular oiling reduces friction, prevents rust, and ensures smooth operation․ Apply a few drops to the bobbin case, hand wheel, and other moving parts monthly or every 50 hours of use for optimal performance․
8․2 Frequency of Lubrication for Optimal Performance
Lubricate your vintage Singer sewing machine every 50 hours of use or monthly if used occasionally․ Apply a few drops of recommended oil to the handwheel, gears, and bobbin area․ Regular lubrication prevents friction, wear, and rust․ Over-lubrication can attract dust, so use oil sparingly․ Always wipe excess oil with a clean cloth to maintain optimal performance and longevity․
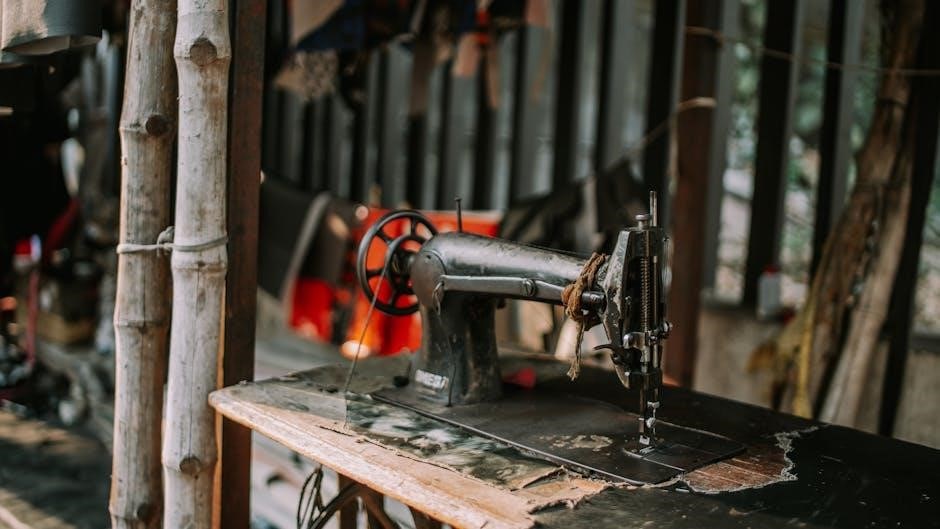
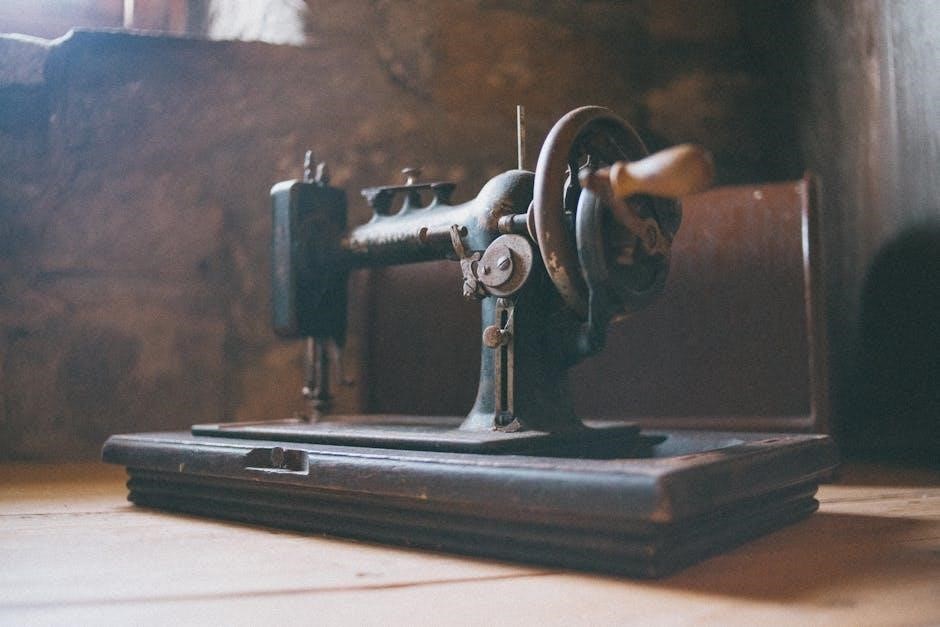
Vintage Singer Sewing Machine Models
Vintage Singer sewing machines are renowned for their craftsmanship and durability, with iconic models like the 99, 66, and 201․ These machines blend historical charm with functionality, appealing to both sewists and collectors․ Their mechanical simplicity and timeless design make them treasured possessions for many enthusiasts worldwide․
9․1 Popular Models from the 1900s-1950s
The Singer 99, 66, and 201 were iconic models from the early 20th century․ The Singer 99, introduced in 1911, was compact and portable, while the 66, launched in 1902, was known for its durability․ The Singer 201, produced from 1934, featured a full rotary hook and exceptional stitch quality, making it a favorite among sewists․ These models remain popular for their reliability and timeless design․
9․2 Unique Features of Each Model
The Singer 99 featured a compact design and reverse stitching capability․ The Singer 66 was known for its vibrating shuttle and durability․ The Singer 201 introduced a full rotary hook, enhancing stitch quality․ Each model offered distinct innovations, catering to different sewing needs, and their unique features contributed to their lasting popularity among sewists and collectors․
Upgrading or Modifying Your Machine
Explore modern upgrades and DIY modifications to enhance your vintage Singer machine’s functionality․ Discover how to integrate new features while preserving its classic charm and performance․
10․1 Modern Upgrades for Vintage Machines
Modern upgrades can breathe new life into your vintage Singer machine․ Consider adding electronic controls, LED lighting, or upgraded motors for improved performance․ These enhancements maintain the machine’s classic charm while offering contemporary convenience․ Ensure all modifications are compatible with your model to preserve its integrity and functionality․
10․2 DIY Modifications for Enhanced Functionality
Enhance your vintage Singer machine with DIY modifications․ Add custom presser feet or specialized attachments for unique stitching․ Create personalized stitch patterns using the machine’s existing mechanisms․ For improved ergonomics, consider adding a custom handle or bobbin storage․ Always test modifications on scrap fabric first to ensure compatibility and functionality․ These tweaks can expand your machine’s capabilities while preserving its vintage charm․
Storage and Preservation
Store your vintage Singer sewing machine in a cool, dry place to prevent rust and damage․ Use a breathable cloth cover to protect it from dust and moisture․ Clean the machine thoroughly before storage, removing any thread and storing bobbins and needles separately․ Apply a light coat of oil to metal parts to prevent rust․ Consider using silica gel packets to absorb moisture․ Store the power cord separately and check on the machine periodically․ For long-term preservation, maintain regular maintenance and consider custom storage solutions․
11․1 Proper Storage Techniques
To ensure your vintage Singer sewing machine remains in excellent condition, store it in a cool, dry place away from direct sunlight․ Use a hard case or cabinet to protect it from dust and moisture․ Clean the machine thoroughly before storage, removing any thread or debris․ Apply a light layer of oil to metal parts to prevent rust․ Cover the machine with a soft, breathable cloth to avoid scratches․ Avoid storing in basements or attics with high humidity․ Check the machine periodically to ensure proper condition․
11․2 Tips for Long-Term Preservation
For long-term preservation, maintain a consistent environment with low humidity and stable temperatures․ Avoid extreme heat or cold, as this can warp metal or crack plastic․ Handle the machine gently to prevent damage to intricate parts․ Polish chrome components regularly to prevent tarnishing․ Store accessories separately in labeled containers to avoid loss․ Use acid-free tissue or cloth to wrap delicate items․ Regularly inspect for signs of wear or pest damage․ Keep the machine upright to prevent oil from seeping into unwanted areas․ Avoid exposure to direct sunlight, which can fade finishes․ Consider using silica gel packets to absorb moisture․ For added protection, apply a clear wax coating to metal surfaces․ Always use a soft cloth when cleaning to prevent scratching․ Ensure all moving parts are well-lubricated but not over-oiled․ Store the power cord separately to prevent tangles or damage․ Keep the machine away from children and pets to avoid accidental harm․ Regularly vacuum dust from crevices using a soft-bristled brush․ Avoid stacking heavy objects on or near the machine; Use a dehumidifier in storage areas to maintain a dry environment․ Consider applying a rust-inhibiting spray to unprotected metal surfaces․ Keep the machine’s original packaging if available, as it provides the best protection․ Store the machine in a location with minimal vibrations to prevent loosening of parts․ Avoid exposing the machine to strong chemicals or cleaning products․ Use archival-quality materials for any storage containers or packaging․ Label all stored items clearly for easy identification․ Store the machine in a way that allows air to circulate around it to prevent moisture buildup․ Avoid storing the machine in attics or basements with poor ventilation․ Use a UV-filtering cover to protect from sunlight if storage near a window is unavoidable․ Keep the machine’s instruction manual in a separate, dry location for easy access․ Avoid over-tightening screws or belts, as this can cause stress on the machine․ Store small parts in sealed, labeled bags to prevent loss․ Consider using a climate-controlled storage unit if long-term preservation is a priority․ Keep the machine away from direct contact with wood to prevent moisture transfer․ Avoid using plastic bags for storage, as they can trap moisture and promote rust․ Use a high-quality, acid-free storage box specifically designed for delicate items․ Store the machine in a location with minimal foot traffic to reduce the risk of accidental damage․ Avoid exposing the machine to strong odors, as they can permeate materials over time․ Use a soft, lint-free cloth to wipe down surfaces before storage․ Store the machine in a way that allows easy access for periodic inspections․ Avoid storing the machine in areas prone to flooding or water damage․ Use a moisture-resistant barrier, such as a plastic sheet, under the storage area․ Keep the machine’s serial number and model information easily accessible for future reference․ Consider taking photos of the machine for documentation before storage․ Store the machine in a location with consistent lighting to prevent fading or discoloration․ Avoid storing the machine near heating vents or radiators to prevent overheating․ Use a sturdy, padded cover to protect the machine from dust and minor impacts․ Store the machine in a location with minimal exposure to pests or insects․ Avoid storing the machine in areas with high air pollution levels․ Use a desiccant packet inside the storage container to absorb moisture․ Store the machine in a location with good airflow to prevent the buildup of stagnant air․ Avoid storing the machine in areas with extreme temperature fluctuations․ Use a high-quality, rust-resistant coating on any exposed metal surfaces․ Store the machine in a location with minimal vibration to prevent loosening of parts․ Avoid storing the machine near open windows or doors to reduce exposure to dust and moisture․ Use a soft, padded surface, such as a towel, to support the machine during storage․ Store the machine in a location with consistent humidity levels to prevent warping or cracking․ Avoid storing the machine in areas with poor air circulation, as this can promote mold growth․ Use a UV-resistant cover to protect the machine’s finish from fading․ Store the machine in a location with minimal exposure to direct sunlight․ Avoid storing the machine in areas with high humidity, as this can promote rust and corrosion․ Use a high-quality, waterproof cover to protect the machine from spills or leaks․ Store the machine in a location with easy access for regular maintenance․ Avoid storing the machine in areas with strong odors or fumes, as these can damage materials․ Use a soft, dry cloth to wipe down the machine before storage․ Store the machine in a location with minimal exposure to dust and debris․ Avoid storing the machine in areas with extreme temperature changes․ Use a rust-inhibiting oil on exposed metal parts before storage․ Store the machine in a location with consistent lighting to prevent fading․ Avoid storing the machine in areas prone to pests or rodents․ Use a high-quality, archival storage box for long-term preservation․ Store the machine in a location with minimal exposure to moisture․ Avoid storing the machine in areas with poor ventilation, as this can promote rust․ Use a desiccant packet inside the storage container to absorb moisture․ Store the machine in a location with consistent humidity levels to prevent warping; Avoid storing the machine near heating vents or radiators․ Use a soft, padded cover to protect the machine from dust and minor impacts․ Store the machine in a location with minimal exposure to direct sunlight․ Avoid storing the machine in areas with high humidity, as this can promote rust․ Use a high-quality, rust-resistant coating on any exposed metal surfaces․ Store the machine in a location with minimal vibration to prevent loosening of parts․ Avoid storing the machine near open windows or doors to reduce exposure to dust․ Use a soft, padded surface, such as a towel, to support the machine during storage․ Store the machine in a location with consistent temperature levels to prevent warping․ Avoid storing the machine in areas with poor air circulation, as this can promote mold growth․ Use a UV-resistant cover to protect the machine’s finish from fading․ Store the machine in a location with minimal exposure to direct sunlight․ Avoid storing the machine in areas with high humidity, as this can promote rust and corrosion․ Use a high-quality, waterproof cover to protect the machine from spills or leaks․ Store the machine in a location with easy access for regular maintenance․ Avoid storing the machine in areas with strong odors or fumes, as these can damage materials․ Use a soft, dry cloth to wipe down the machine before storage․ Store the machine in a location with minimal exposure to dust and debris․ Avoid storing the machine in areas with extreme temperature changes․ Use a rust-inhibiting oil on exposed metal parts before storage․ Store the machine in a location with consistent lighting to prevent fading․ Avoid storing the machine in areas prone to pests or rodents․ Use a high-quality, archival storage box for long-term preservation․ Store the machine in a location with minimal exposure to moisture․ Avoid storing the machine in areas with poor ventilation, as this can promote rust․ Use a desiccant packet inside the storage container to absorb moisture․ Store the machine in a location with consistent humidity levels to prevent warping․ Avoid storing the machine near heating vents or radiators․ Use a soft, padded cover to protect the machine from dust and minor impacts․ Store the machine in a location with minimal exposure to direct sunlight․ Avoid storing the machine in areas with high humidity, as this can promote rust․ Use a high-quality, rust-resistant coating on any exposed metal surfaces․ Store the machine in a location with minimal vibration to prevent loosening of parts․ Avoid storing the machine near open windows or doors to reduce exposure to dust․ Use a soft, padded surface, such as a towel, to support the machine during storage․ Store the machine in a location with consistent temperature levels to prevent warping․ Avoid storing the machine in areas with poor air circulation, as this can promote mold growth․ Use a UV-resistant cover to protect the machine’s finish from fading․ Store the machine in a location with minimal exposure to direct sunlight․ Avoid storing the machine in areas with high humidity, as this can promote rust and corrosion․ Use a high-quality, waterproof cover to protect the machine from spills or leaks․ Store

Finding Instruction Manuals
Locate original Singer sewing machine manuals through online archives, vintage sewing communities, or antique shops․ Digital versions are often available on dedicated sewing forums or eBay․
12․1 Online Resources for Vintage Manuals
Vintage Singer sewing machine manuals can be found on dedicated websites, forums, and marketplaces․ Platforms like eBay, Etsy, and specialized sewing communities often have scanned copies available for download․ The Singer Company’s official website and library archives may also provide access to digitized versions․ Ensure authenticity by verifying sources and cross-referencing with model numbers for accurate and reliable information․
12․2 Purchasing Original or Reproduction Manuals
Original Singer sewing machine manuals can be purchased from antique shops, estate sales, or online marketplaces like Etsy and eBay․ Reproduction manuals are also available from specialty retailers, offering cost-effective alternatives․ Ensure authenticity by buying from reputable sellers and checking for original branding or high-quality scans․ These resources help preserve functionality and provide invaluable guidance for vintage machines․

Community and Support
Join sewing forums, social media groups, and local communities to connect with Singer sewing machine enthusiasts for advice, troubleshooting, and tips on using your vintage machine effectively․
13․1 Sewing Communities and Forums
Engage with online sewing communities, forums, and social media groups dedicated to vintage Singer machines․ These platforms offer valuable resources, troubleshooting tips, and advice from experienced users․ Share your projects, learn from others, and gain insights into maintaining and using your machine effectively․ Many enthusiasts also post scans of rare manuals and guides, making these communities indispensable for owners of vintage models․
13․2 Repair Services for Vintage Machines
For complex repairs, consider professional services specializing in vintage Singer machines․ Experienced technicians can restore functionality, ensuring authenticity and performance․ Research local or online repair shops, and request cost estimates․ Many offer refurbishment services, parts replacement, and tuning․ Check reviews to find reliable experts who understand the unique needs of antique sewing machines, ensuring your treasured device operates like new․

Safety Precautions
Always stay grounded when operating vintage machines to prevent electric shocks․ Avoid sewing in damp environments and ensure all parts are securely attached․ Use original Singer components for safety and performance․ Keep children and pets away while sewing․ Regularly inspect cords and plugs for damage to ensure safe operation․
14․1 General Safety Tips for Using Vintage Machines
Always inspect your vintage Singer machine for loose parts or damage before use․ Ensure the needle is securely attached and the correct type for your fabric․ Keep the sewing area clean and well-lit to avoid accidents․ Never sew near flammable materials or in damp conditions․ Supervise children when the machine is in use․ Use the correct foot control to maintain control of stitching speed․
14․2 Electrical Safety Considerations
Always use the original power cord or a high-quality replacement․ Avoid damaged plugs or frayed cords․ Keep the machine away from water and moisture․ Never operate the machine near open flames or sparks․ Ensure proper grounding to prevent electrical shocks․ Unplug the machine when not in use or during maintenance․ Regularly inspect electrical components for wear and tear to ensure safe operation․
Restoring and maintaining your vintage Singer sewing machine is a rewarding journey․ Proper care and attention ensure years of reliable service and creative sewing experiences․
15․1 Summary of Key Points
Restoring and operating a vintage Singer sewing machine requires careful attention to its mechanisms, lubrication, and threading․ The instruction manual is essential for understanding model-specific features and troubleshooting common issues․ Regular maintenance ensures longevity, while accessories enhance functionality․ Exploring historical models and connecting with sewing communities can deepen your appreciation and skills․ Enjoy the creative journey of preserving and using your vintage Singer machine․
15․2 Encouragement for Further Exploration
Embrace the joy of working with your vintage Singer sewing machine by exploring its full potential․ Dive into creative projects, experiment with attachments, and connect with sewing enthusiasts who share your passion․ The timeless charm of these machines invites you to uncover their history and innovate with modern techniques, ensuring your Singer remains a trusted companion for years of sewing adventures․